This is my stop motion video. I added a cartoon effect to make the video more interesting.
Wednesday, May 9, 2012
Tuesday, May 8, 2012
Test

In order to change the color of the sky, I started by duplicating the background layers. Then I selected only the sky using the magnetic lasso tool. Once only the sky was selected I went into layers and played around with the hue and saturation until I got the sky to be green.
To place the woman onto the panorama, I had to first modify the image size so she would be an appropriate size to be placed onto the panorama. I then selected only the woman by using the magnetic lasso tool while leaving out the white background. Following my selection, I used the move tool to drag the selected woman onto the panorama.
Thursday, May 3, 2012
Photoshop Assessment

I chose this photo for my photoshop assessment as it is one of my favorite photos that I have edited using photoshop. Firstly, I adjusted the levels and curves. Then, I used the clone stamp in order to fix little imperfections throughout the photo. Following the clone stamp, I decided I wanted to change Hannah's eye color to red. In order to do so, I used the magnetic lasso tool to select her eyes. Lastly, I whitened her teeth. Once again, I used the magnetic lasso tool to select her teeth. There are many different selection tools but the one I used for this photo and prefer to use is the magnetic lasso tool!
My Favorite Photo

This photo has got to be my favorite photo. I really like it because I have never done a photo with this type of effect before. I like how you see the water droplet in action. Also, the materials used in this photo are original/unique.
Rule of thirds

This photo is evidently of a mac desktop computer. It follows the rules of thirds. I also edited this photo so it could have a nice effect as the original was dull and quite boring.
Tuesday, May 1, 2012
Planet Panorama

This is my planet panorama. The first step was to take a 360˚ panorama. The 360˚ panorama consisted of 12 photos. Just like the 180˚ panorama, I had to make sure the photos overlapped by 25%. Once the photos were downloaded onto photoshop elements, I used the photo-merge panorama tool once again. I then had to crop my panorama as the "fill in the edges" tool did not function. Once that was complete, I had to make my panorama into a square by making the width of the photo the same measurements as the height. The following step was to rotate it 180˚ and then use the polar coordinates tool. The final step was to use the healing brush and clone stamp to fix up the photo.

180˚ Panorama

This 180˚ panorama was taken outside the main entrance of Dawson College. I took 8 photos starting from left to right. Each photo had to overlap each other by 25%. Once the pictures were taken I opened them up into photoshop elements. I then used the photo-merge panorama tool to allow all the pictures to bond together and create a 180˚ panorama. Since the "fill in the edges" tool did not work, I had to crop my panorama. The last step was to fix the photo using clone stamp and healing brush.

This was another 180˚ that I created. The same steps were used as the previous panorama.
Portraits (rembrandt lighting)

Rembrandt lighting


Rembrandt lighting with a reflector.

Portraits (without rembrandt)


Sunday, April 8, 2012
Water Droplet

In order to take a photo like this, my group and I had to shoot the photo with a fast shutter speed. We also had to use a diffuser on our light source as it was too bright. This photo was shot at 1/500 of a second and used an f stop of 5.6. We got many other photos using other objects but this one seemed the "coolest"!!

This was another cool and successful water droplet photo. We used a light source and a red filter transparency paper to make the water look red. This photo was also shot at 1/500 of a second and used an f stop of 5.6 once again.
Monday, March 26, 2012
Ghost

Sunday, March 25, 2012
Panning

This panning photo is of myself outside wearing a Hugh Hefner mask. In order to have this successful panning image, I spun in a circle and snapped the photo so the camera focused on me and made the background blurry.

This is another panning photo of myself in my house with low lighting conditions. I also used the flash in this panning photo unlike the previous one.


Thursday, March 15, 2012
Painting With Light
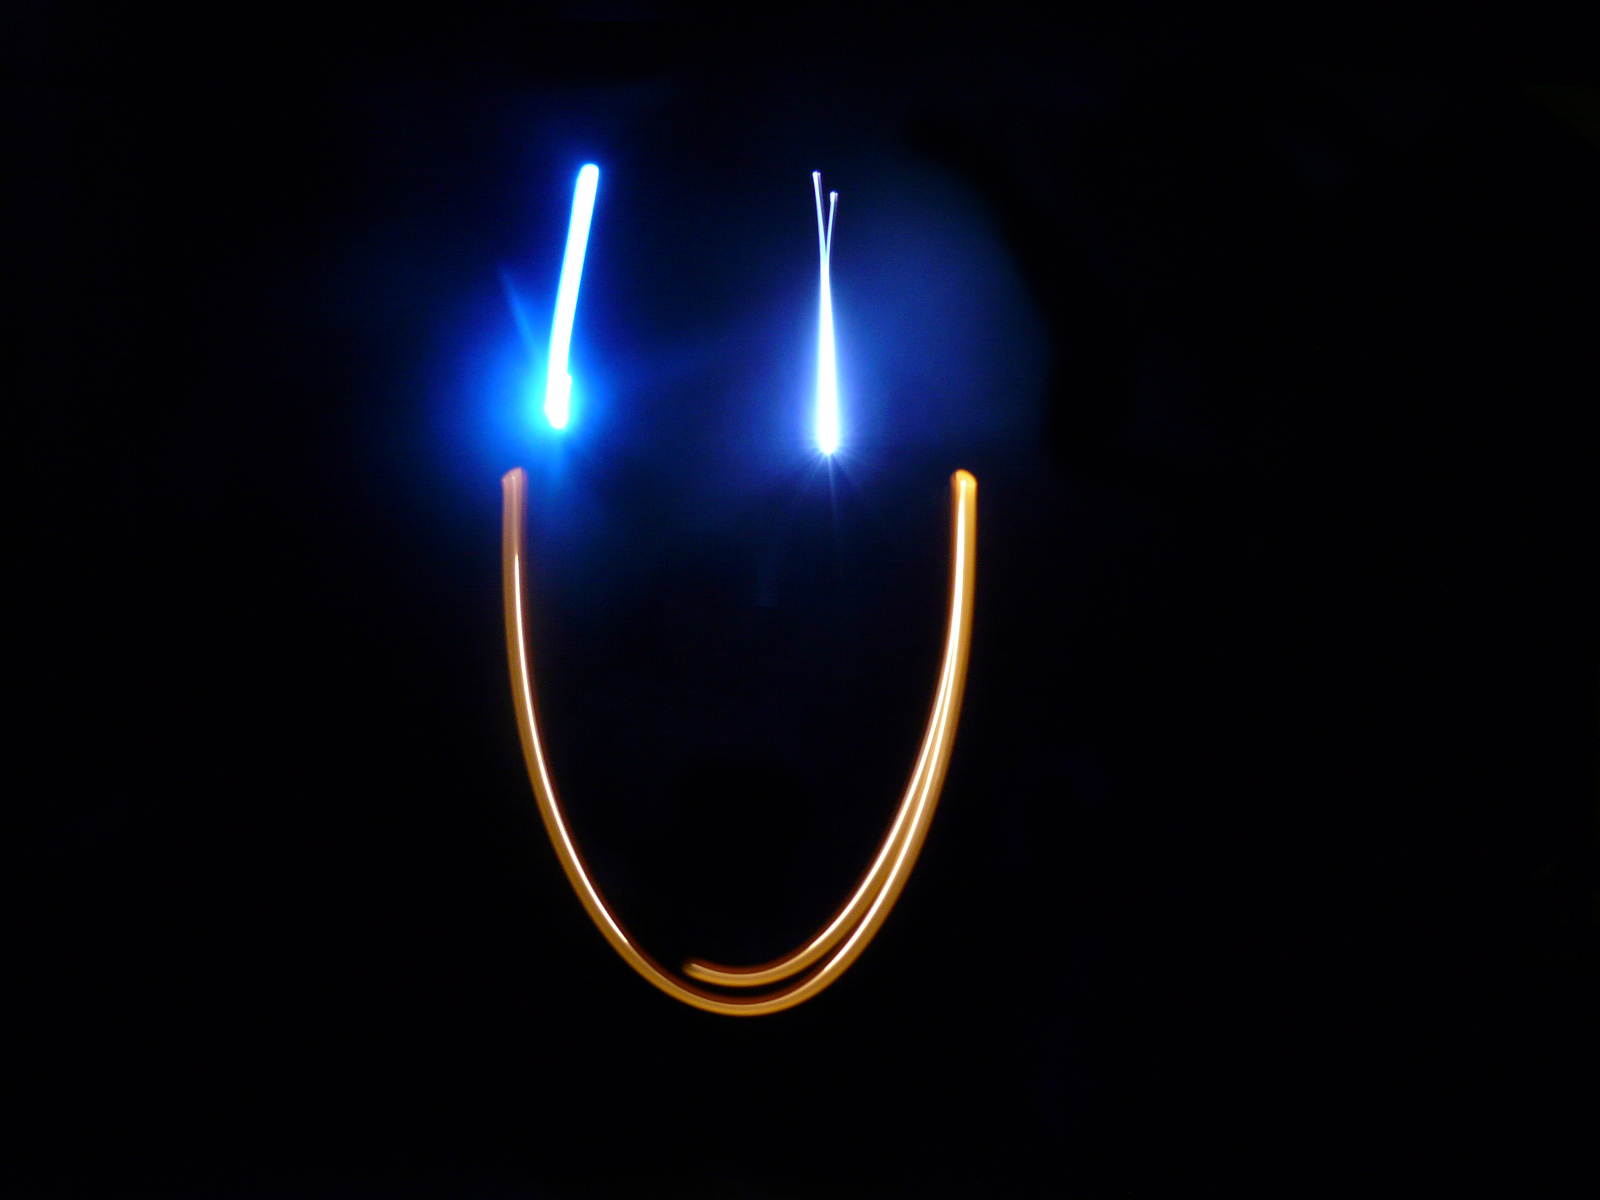
This photo was made using two laser lights and a small flash light with an orange filter transparency paper to change the color of the light. I also used a very slow shutter speed and evidently, the photo was shot in a completely dark room.
Tuesday, February 14, 2012
Self-Portrait

This is a portrait of myself taken in my car with a racing helmet on. Evidently, I am trying to portray that I like cars and racing!
Wednesday, February 1, 2012
Photograms Experiment
Doing the photograms was fun! When attempting a photogram,
there has to be no lights present, as it will damage the photographic paper.
The only lights that don’t affect the paper are the colors red and orange. The
first step is to place your objects onto the paper, then, expose light for five
seconds using a light source for example a cell phone. The following steps
include putting your photogram in chemicals. I put my photo in the first
chemical called the “developer” for one minute. Then, I put it into the
“stopper” for 30 seconds and finally into the “fixer” for two minutes. The
following step is to put the photo into water for five minutes. Lastly, the
photo is put into a machine that dries and develops the photogram.
Out of my three attempts, the final photogram was the most
successful one. My first photogram came out dark on one half of the photo and
light on the other. The cause of this is because I hadn’t exposed the proper
amount of light equally throughout the photo. My second attempt had improved.
My photogram was somewhat successful as I exposed light onto the photographic
paper for three seconds instead of five. My final attempt was the most
successful attempt. The quality of my photogram improved as I used different
objects. Another factor is that I now had placed a film paper that acted as a
tint to my screen, which allows less light to project onto the photographic paper.
This photogram turned out to be the most successful one out of all my other
attempts.
 The picture above is my final photogram!

Subscribe to:
Posts (Atom)